Godot - Asteroids Game For Complete Beginners: 1
Back
Next Article: Godot - Asteroids Game For Complete Beginners: 2
Author: Yiannis Charalambous
Reading Time: 10 minutes
Tags: Godot · Tutorial
Introduction
This tutorial is designed for people with little to no experience with programming who want to learn how to create games using the Godot game engine.
This article will cover:
- How to setup Godot.
- How to use the editor on a very basic level.
This article will not cover how to write a full/complex game, in order to do that, you need to know the basics. The game will be 2D as that is the easiest type of game for beginners to understand. At this level, the third dimension adds an extra layer of complexity that is unnecessary.
![]()
Setup
Downloading Godot
Downloading Godot is very easy, it is a standalone executable so all that is required is heading over to the Godot website’s downloads page and downloading it.
While you’re there, notice that there’s a learn tab that takes you to the documentation of the engine written by the engine developers and contributors. You currently might not be able to fully understand some or all of the things there, if you do not, then this tutorial will help you do so.
The tutorial is currently designed for Godot version 4.0 as that is the latest version of Godot. Versions earlier than 4.0 may not be compatible with this tutorial. Versions succeeding 4.0 may still be compatible with this tutorial. It is always recommended you start new projects with the latest stable version of Godot available.
Creating a New Project
Once Godot is running, you will be greeted by the project manager. Godot allows you to work on multiple projects, here is where you can manage them. The window is divided into two sections, the section on the left is the list of projects that are currently on your computer. If this is your first time using Godot, then the list on the left should be blank. The list on the right is for managing those projects, each button allows for a different action. Currently click on the button with the text “New Project”.
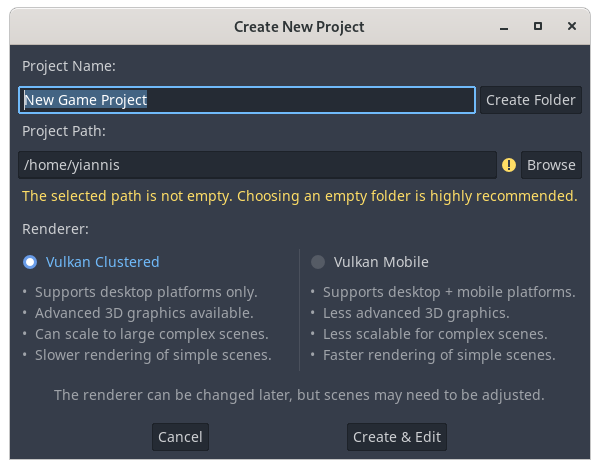
The project creation window should now appear. The top text box labeled “Project Name” should allow you to name your project. The text box below that labeled “Project Path” allows you to select a location to where the project will be saved upon creation. Godot only lets you create a project in an empty folder, so if you pick a folder that is not empty, you can click the “Create Folder” button to create an empty folder to place your project in. There are more options in this dialog box, but for now, they are not necessary. When you are finished, click on the “Create & Edit” button to create your new project.
Editor Basics
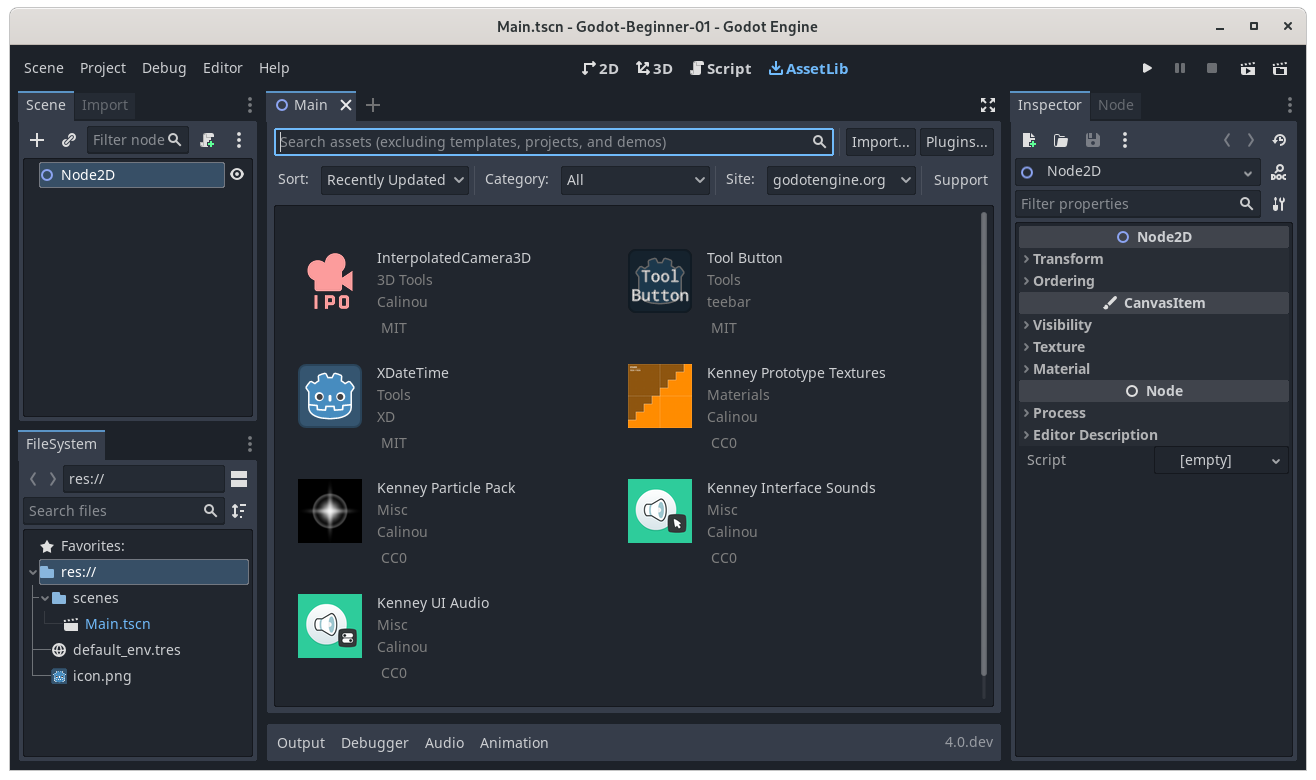
The editor should appear upon creating your new project. The image below shows the editor once it has launched with a newly created project.
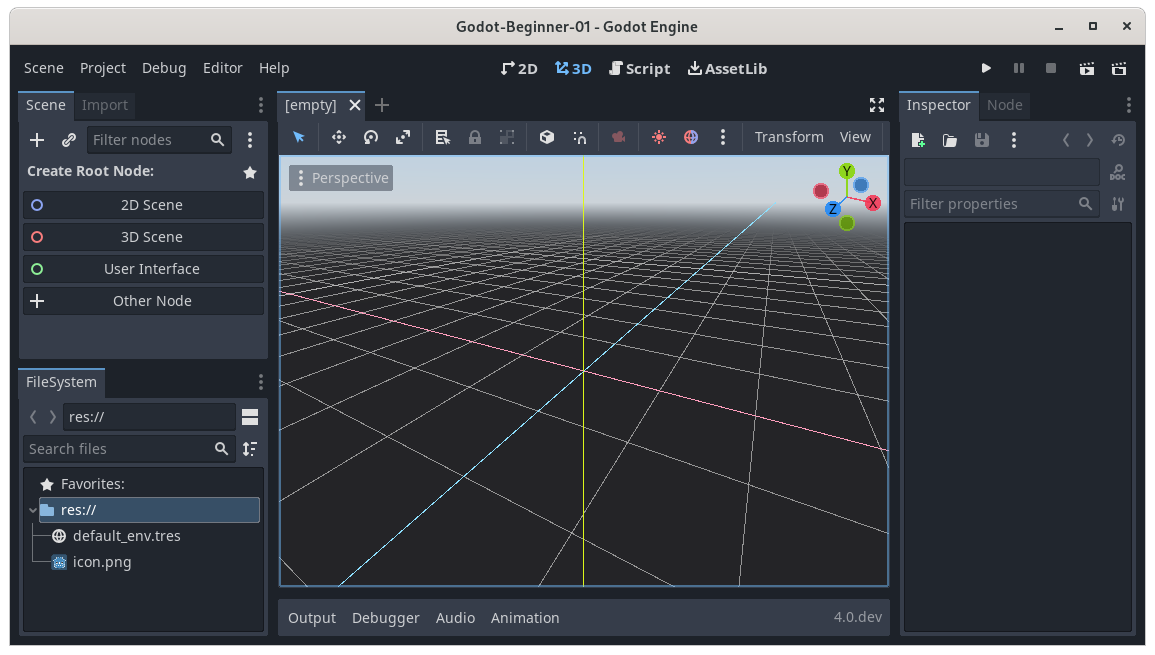
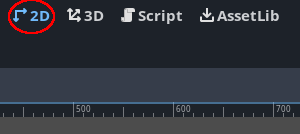
In the center of the scene you can see your viewport, it is the large window that is displaying the 3D grid. In this tutorial, we will be making a 2D game, so let’s switch to the 2D view by clicking on the 2D button at the top of the viewport. Alongside it are other buttons, 2D, 3D, Script and AssetLib. For now we will be in 2D mode, however, we will go over what all the other buttons do aside from the 3D mode button.
You will notice that the viewport has now changed, instead of a 3D grid, there’s now a 2D gray surface instead, this is the 2D viewport. Also notice there are some other panels aside from the viewport. Each panel in the editor serves an important purpose. We will cover what they do later.
Click on the 2D Scene button on the Scene tab as shown below. Doing that will cause the 2D Scene, 3D Scene, User Interface and Other Node buttons to disappear and be replaced by a list with only one populated item named Node2D.
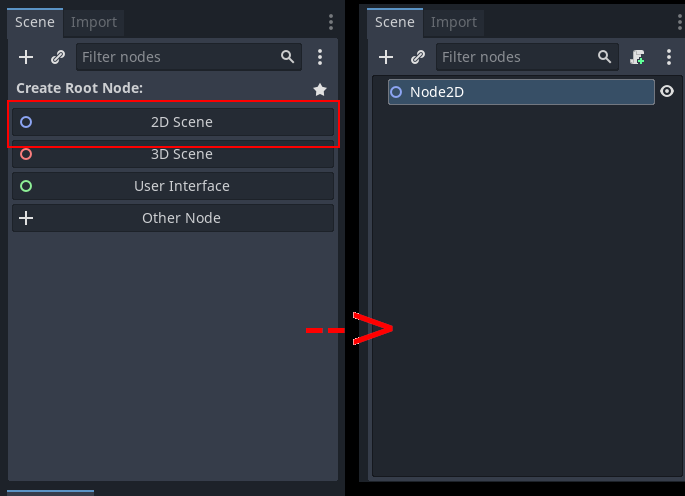
The panel that this list is inside of is called the Scene tab, it lists all of the nodes that are added into the scene. For now, think of nodes as objects that exist in the scene. As you can see, there is one node called Node2D added.
Let’s save this empty scene that we have just created, we will slowly create
our game in this scene. Press ctrl+s to bring up the save dialog or go to
Scene->Save Scene at the top menu bar. Select a location to save the scene to
in your project tree. It is important to be organized when developing games as
it increases productivity, makes your project more readable and understandable,
especially when you or someone else looks at it later on.
Create an empty folder using the Create Folder button at the top right. Name it “scenes”, then save the current scene as “Main.tscn”. If you look at the bottom left of the editor window now, in the panel called “FileSystem”, you now see the newly created “scene” folder, clicking the arrow next to it will expand it revealing the “Main.tscn” scene that we have just saved.
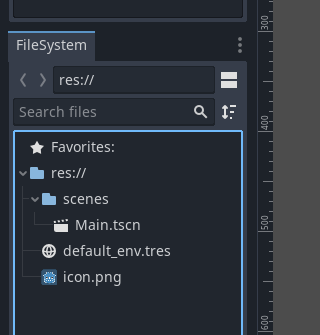
The FileSystem panel allows us to view all the assets and resources that are accessible to our project. Now that we have a scene saved, we can run the project. At the top right corner of the editor window, there are five buttons, Play, Pause, Stop, Play Scene, Play Custom Scene.
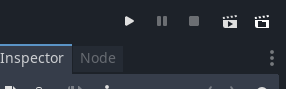
All these buttons allow us to run the game, pause it, and stop it from running. Press the Play button, which is the left-most button in the list. A dialog should popup, Godot doesn’t know what scene it should launch the game with, click on “Select Current” to set the currently open scene as the starting scene, alternatively, “Select” will bring up the file select dialog to select a scene manually. Either way, select the Main.tscn scene we have just saved. A blank window should pop up now. That is the game running! Currently it’s not doing much, but that is because we haven’t told it to do anything yet. We need to first import some assets so we can start making a simple game.
Importing Assets
Importing assets allows us to use said assets in our project. Assets can be anything, in this instance, we will import some game sprites so we can have a character in our game, an enemy, and a bullet.
There are three ways to import assets:
- Drag the file into the folder you want to import it in in the FileSystem panel.
- Copy the files into your project directory through your operating system’s file manager, Godot will automatically recognize and import the assets.
- Using the AssetLib mode on the editor window. Recall the 2D, 3D, Script, and AssetLib buttons at the top area of the editor. We were in 2D mode, click on AssetLib to switch to AssetLib mode.
Switching to AssetLib mode changes once more the viewport, now it shows a list of assets that we can import for free into our project! All these assets can also be found on the Godot website’s Asset page.
The 2D sprite pack we want however can be found here. We will manually import this art into the engine and use it, as we are making a 2D space shooter game. Right click on the “res://” folder on the FileSystem panel on the bottom left, then select “New Folder”, name the new folder “sprites”. Extract the zipped content pack and drag the following sprites from the downloaded asset pack into the sprites folder:
- PNG/Meteors/meteorBrown_big1.png
- PNG/Meteors/meteorBrown_big2.png
- PNG/Meteors/meteorBrown_big3.png
- PNG/Meteors/meteorBrown_big4.png
- PNG/Meteors/meteorBrown_med1.png
- PNG/Meteors/meteorBrown_med3.png
- PNG/Meteors/meteorBrown_small1.png
- PNG/Meteors/meteorBrown_small2.png
- PNG/Meteors/meteorBrown_tiny1.png
- PNG/Meteors/meteorBrown_tiny2.png
- PNG/playerShip1_blue.png
- PNG/ufoRed.png
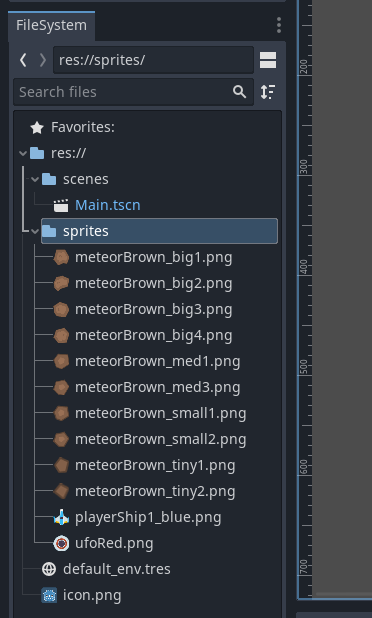
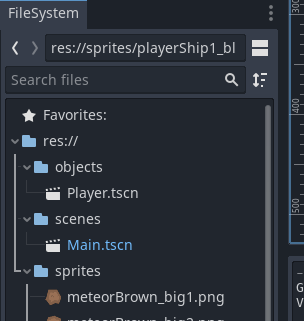
After importing the sprites into the project, the FileSystem should look like this:
The assets just imported can now be used in our project. It is important to understand the node system that Godot has in place before we continue, in the next section, the node system will be briefly introduced.
The Node System
Nodes are fundamental to Godot, they are used for creating creating each element of a game. The Node2D created in our Main.tscn is in fact a node. What makes nodes so special is the fact that they can be a child or a parent of another node. Right click on Node2D in the Scene panel and click on Rename. Rename it to “Main” so it matches the name we chose when we saved the scene node in our FileSystem.
We can drag the sprites we imported into our viewport, they will be added into our scene as children of Main. The sprites added into our scene will actually be added as Sprite2D nodes.
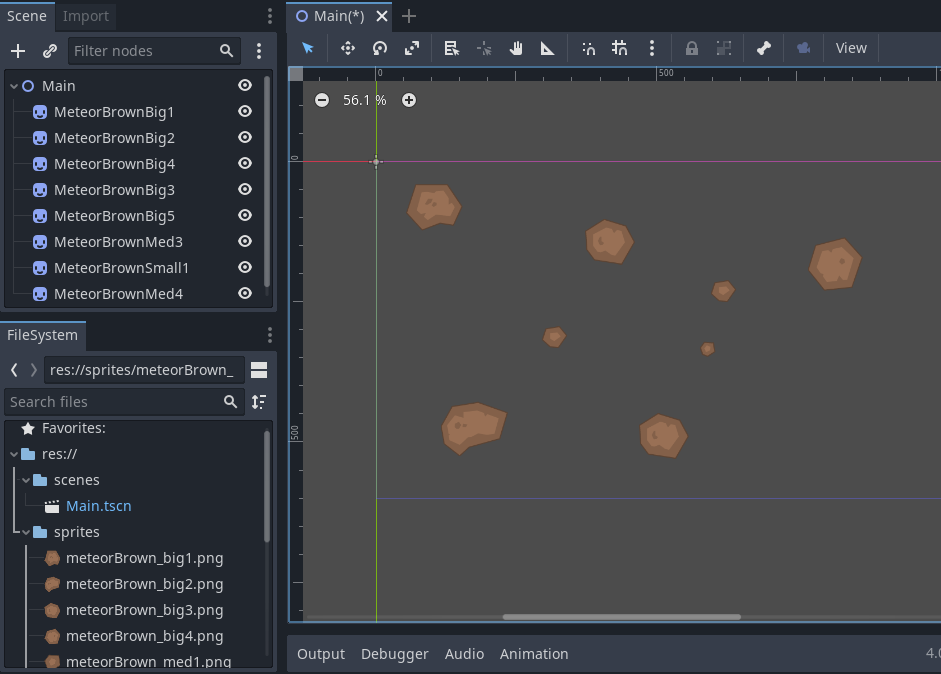
Clicking on one of the sprites in the Scene panel changes the panel on the right side of the editor window named Inspector. The Inspector panel shows all the properties of the currently selected node. We can see the Sprite2D node has a property called Texture that references the sprite in our project, that is how it is able to be shown as a node.
Creating the Player Ship
We will now create our a character that can shoot bullets and break those meteors that we have placed. Create a new folder in the FileSystem called “objects”. Our player will be a node, the player node will have some behavior attached to it that will allow it to be controlled by us. We will save the player and behavior as a separate scene inside of the objects folder. It is worth noting that scenes are nodes that are saved into the file system.
At the top left menu of the editor window, click Scenes->New Scene. A new
tab in our viewport will have appeared now. This tab shows an empty scene
similar to how the viewport was before we created the Main scene and saved it.
Click on the 2D Scene button in the Scene panel to create another Node2D which are the basic building blocks of a 2D game. Rename the node to “Player”. We will now add the playerShip1_blue.png sprite that we have imported previously as a child Sprite2D node to the root Node2D node. This can be done by dragging the sprite from the FileSystem to the viewport like before. You will notice the ship is added as a child of the Player node in the scene panel.
It is a good time to save the scene we have just created into the objects folder in our file system. You will notice that Godot has automatically chosen the name Player.tscn for our scene, this is because the root node is named Player.
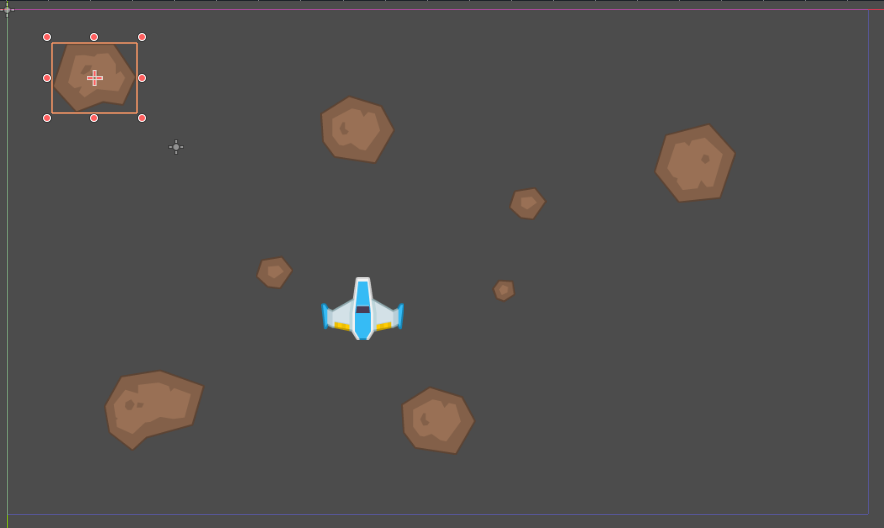
We can now drag the Player object into the Main scene we had created before. If we run the game now, we can see the meteors and our player ship, however, we cannot do anything yet because we have not programmed anything in the game yet. In the next section, we will program some basic behavior and attach it to the player scene.
Project Files
The project files for this tutorial can be accessed on GitHub. You can use these files as reference material if you get stuck while following the tutorial. The project files for part 1 and part 2 are combined so downloading the material at this stage will include things that are going to be taught in part 2.
Useful Links
Here are some Godot documentation pages which describe some of the topics that we have explored today. It is highly recommended you read them when you are ready as this tutorial does not explain the way the underlying systems work in Godot, that is not the goal. The goal of this tutorial is to get beginners introduced into the engine and get them to a point where they are comfortable enough to explore and learn by themselves. It would be impossible to create a tutorial that fully explains every aspect of game creation and Godot while at the same time being able to be completed in about an hour.
What’s Next
It is recommended that at some point you check the useful links section in order to get a better understanding of some of the concepts that appeard in this article. Also, check out part 2 of the tutorial series.