Godot - Asteroids Game For Complete Beginners: 3
Back
Previous Article: Godot - Asteroids Game For Complete Beginners: 2
Next Article: Godot - Asteroids Game For Complete Beginners: 4
Author: Yiannis Charalambous
Reading Time: 9 minutes
Tags: Tutorial · Godot
Introduction
This is part 3 of the tutorial series for making an asteroids style game in Godot, designed for absolute beginners with little to no experience in programming.
This article will cover:
- Creating bullets for the player ship.
- How to make the player ship shoot bullets.
- Making the asteroids break when hit by the bullets.
Before going through this article, it is recommended following the steps outlined in part 1 of this tutorial series.
The Bullet Scene
First start by creating a new scene; Scene->New Scene at the top menu bar,
this scene will be used to represent a single bullet. Once the new scene is
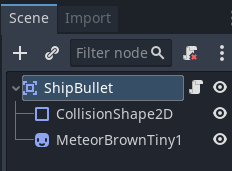
created, in the Scene panel, create a 2D Scene. Rename the root node from
“Node2D” to “ShipBullet” and save the scene into the objects folder in the
project files. Change the root node’s type to “Area2D”, this is because, while
the bullet will move, we will only change the position of the bullet and check
if it overlaps with any asteroids, and Area2D is a good candidate for this.
Proceed to add a new node as a child of type CollisionShape2D. In the
Inspector panel, click on the [empty] value of the shape property and assign
a New CircleShape2D.
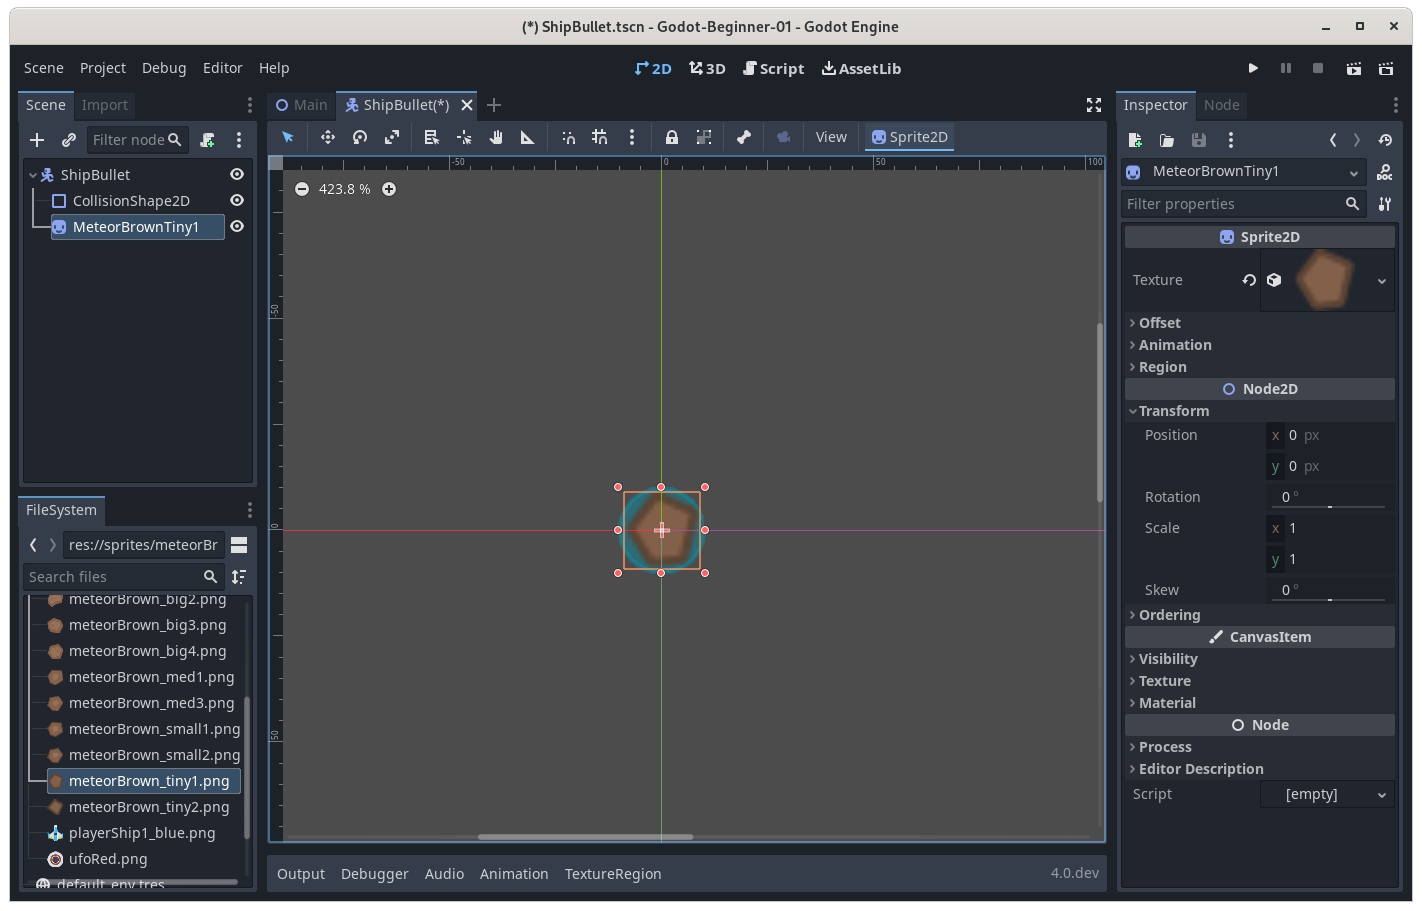
From the FileSystem panel, in sprites folder, drag the meteorBrown_tiny1.png into the scene to use as the sprite for the bullet. Like before, make sure to center it to the origin of the scene so it overlaps with the CollisionShape2D.
The Bullet Code
It is time to create a script that will cause the bullet to move forward, along
with assigning it to the scene. In the FileSystem panel, right click the code
folder and click on New Script, name it ShipBullet.gd. Make sure it inherits
Area2D. Drag and drop the newly created script from the FileSystem panel to
the ShipBullet root node in the Scene panel.
In FileSystem, double-click the script to open it. The ship bullet code should look like this:
|
|
This code will cause the bullet to move forward, the _process function will be
called repeatedly, and so, the position of the ship will be updated from its
previous value to 500 pixels forward every second. position is a built-in
property of Area2D along with many other basic types. The += adds to the
position with the value on the right of it. The value on the right is a
Vector2D, it is a value that represents a direction in this case, but it can
also represent a position. In reality, Vector2D is just 2 numbers grouped
together as a unit, so it can be used to represent many things, in this case, it
represents a change in position. The respective X and Y values of the change
in position are entered inside the brackets and are separated by commas. In this
case, the X change in speed is speed * delta (which in short, means that the
bullet will progress by speed amount of pixels per second, which is 500 as shown
above), the Y change is 0. The vector is then rotated by calling the function
rotated and passing the built in rotation variable as a parameter.
This means that the final vector that is added to the position will be a vector that points forward from where the bullet is facing. So, when the bullet is going to be created, it will be assigned a position (which will be the ship’s position), and it will be assigned a rotation (the ship’s rotation), and then it will move away from the ship in the direction that it is fired from.
Shooting the Bullets
This section will cover how to spawn the bullets from the ship, when the space
button is pressed. First start by openning the code/Player.gd file in the
FileSystem panel. This is the code that should be added to the player ship
script to allow it to fire bullets:
|
|
The script first declares some variables which are accessible by every method in
the script. This is because the variables fire_cooldown, fire_cooldown_left,
and bulletPackedScene are declared outside of any method.
The method fire_bullet when called will:
- Spawn a bullet.
- Add the bullet into the “level” where everything exists.
- Set the rotation of the bullet so that it faces away from the ship.
- Set the position of the bullet to be the same as the ship.
Each line in the fire_bullet method maps directly to one line in the
explanation.
The _process is responsible for calling fire_bullet when the space bar is
pressed, the only issue is that there needs to be a cooldown, since if there is
no cooldown, a bullet will be created everytime _process is called, which will
create a very large amount of bullets. The fire_cooldown variable declared
earlier stores the amount of time we want the ship to cooldown before firing
another bullet. The time has been set to 0.75 seconds. fire_cooldown_left
will store how much time is left before the timer hits 0. So, in essense,
fire_cooldown_left is the amount of time left on the timer, and
fire_cooldown is the time it gets reset to when fire_bullet is called.
The _process method only has two if statements:
- The first checks if the timer for the fire cooldown is less than or equal to
0. If it is then it callsfire_bulletwhich spawns a bullet and fires it. Then, it sets thefire_cooldown_lefttofire_cooldown. - The second if statement checks if the
fire_cooldown_leftis greater than0, if it is, then it decrements it bydelta.
This effectively makes fire_cooldown_left a timer that gets reset everytime
space is pressed and a bullet is fired.
What is a delta?
delta is an argument that appears for methods like _process and
_physics_process, it represents the amount of time, in seconds, between the
same method being called. This allows for useful calculations such as measuring
the amount of time that has passed.
Breaking the Asteroids
In order to make the asteroids breakable, we will create a scene that contains
an Area2D, in order for it to be able to intersect and be detected by the
bullet’s Area2D. The scene will also have a Sprite2D that will be used to
show the asteroid, and it will also have a script attached so that the asteroid
can be made to move slowly towards the ship.
The asteroids already placed in the level in the previous tutorial will all need
to be selected and deleted since they are just Sprite2D nodes. In the Scene
panel, select all the asteroids and right click and select Delete Node(s). It
is worth noting, that multiple nodes can be selected at the same time by holding
down shift. With just the ship left in the level alone, click on the Scene
button at the top left of the window, then click on New Scene. An empty scene
will be created, in the Scene panel select the 2D Scene option.
Rename the Node2D just created to Asteroid. Change the type of the node from
Node2D to Area2D. Save the scene at objects/Asteroid.tscn Like before when
creating an Area2D, right click on the node in the Scene panel and add a
CollisionShape2D node as a child. Select the newly created collision shape 2D,
in the Inspector panel, the Shape property will have a value of [empty],
clicking the value will allow you to select the New CircleShape2D option which
will create a circle shape resource for the CollisionShape2D node that we just
created.
Additionally, drag a sprite of your choosing into the center of the
Asteroid scene from the res://sprites/meteorBrown_big1.png folder in order to
make the asteroid visible. Adjust the CollisionShape2D size to approximatley
cover the asteroid sprite.
Create the asteroid script in the FileSystem panel by right clicking on the
code folder and selecting the New Script option. The script will inherit
Area2D, and be saved in the code/Asteroid.gd folder. Don’t forget to drag and
drop the Asteroid.gd script from the FileSystem panel to the Scene panel and
onto the Asteroid node. The code that Asteroid.gd now contains is shown
below:
|
|
This is a very simple script. In the _ready method, the script initializes a
signal. Signals are a fundumental element of event driven programming, when
the Area2D overlaps with another Area2D, it will cause the area_entered signal
to emit. The connect function connects the area_entered signal, to the
area_entered method we have created below.
The area_entered method’s purpose is to delete the asteroid node when it
overlaps with another Area2D. This method will be called by the Area2D node
automatically. The method takes an Area2D parameter called area, while this
is not used, it is necessary since in order to connect the signal, the method
needs to have that parameter. All it does is it calls the queue_free method
that deletes the asteroid node fevent driven programmingrom the scene.
Now, it is time to place asteroids in the level by dragging them from the
FileSystem panel into the viewport. When the game is executed (with F5), the
ship can now shoot and destroy the asteroids placed in the level.
Project Files
The project files for this tutorial can be accessed on GitHub. You can use these files as reference material if you get stuck while following the tutorial.
Useful Links
What’s Next
Part 3 covered a lot of topics that may not have been fully explained, it is recommended that you read the articles in Useful Links in order to better understand them before moving to Part 4.